Operating the TDC Stereo 116 Projector
The TDC Stereo 116 projector operates in a fairly straightforward manner, but there are a few subtleties that might not be apparent on a first look. Here are a few tips on making your 116 perform at its best.
The Fan
The cooling fan draws air from underneath the projector, so do not run the projector while it is sitting in the bottom of its case. It will run cooler if it is sitting on a table top or projector stand.
If your projector has not been modified by a previous owner, the cooling fan will come on when either of the lamps are turned on and will shut off when both have been turned off. In the 15+ years that the 116 was in production, TDC never felt that the two 500w bulbs needed additional cooling after the bulbs were turned off so never installed a separate switch for the fan like their higher powered model uses. I have not seen any ill effects from the fan shutting off with the bulbs, however, you should wait until the projector has cooled down before touching the cooling fins, putting it in its case, or (if you live in a colder climate) taking the projector out into cold weather. If you do so you will: burn your fingers, start the case on fire, or break the lamps.
The Changer
The 116 had several variations to their slide changers, so I will try to point out some of the more common features. All of the 116 changers have a flat metal bar with slots on the bottom,or two metal tabs that fit into the channel in the middle of the projector. Be sure that these guides fit all of the way in the channel and it is not sitting crooked. Early changers had a metal tab on top that swing into the front and under a tab on the black metal frame inside the lens housing.
The most common carriers from the 1950's have a spring metal tab on the front of the carrier that fits into a notch on the black metal frame.
When the changer is properly inserted, which ever tab you have should fit firmly into its respective catch. The changers are made of aluminum and can get bent out of shape. If you are having problems getting it to fit properly, take the changer out and check to be sure that it is straight. If not, you may have to do a little bending to make it work properly.
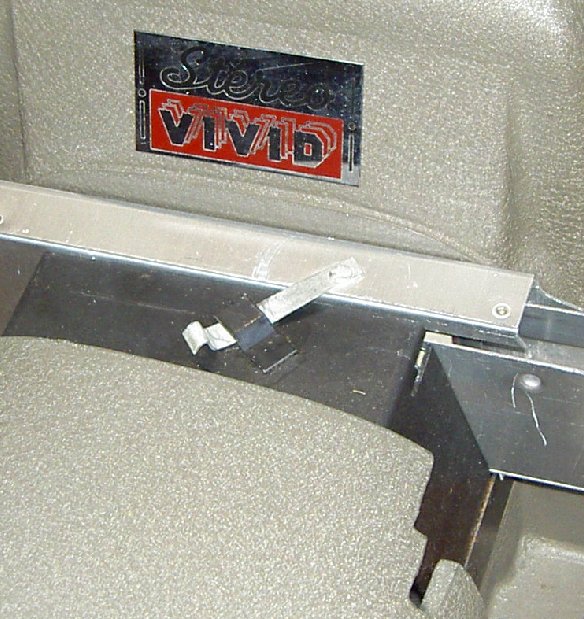
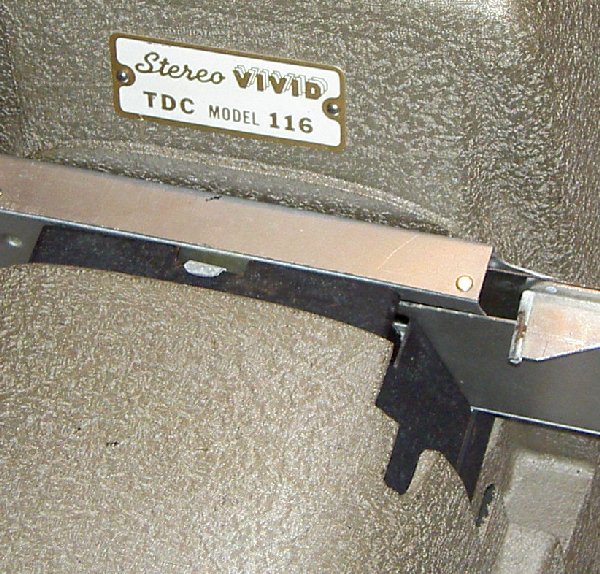
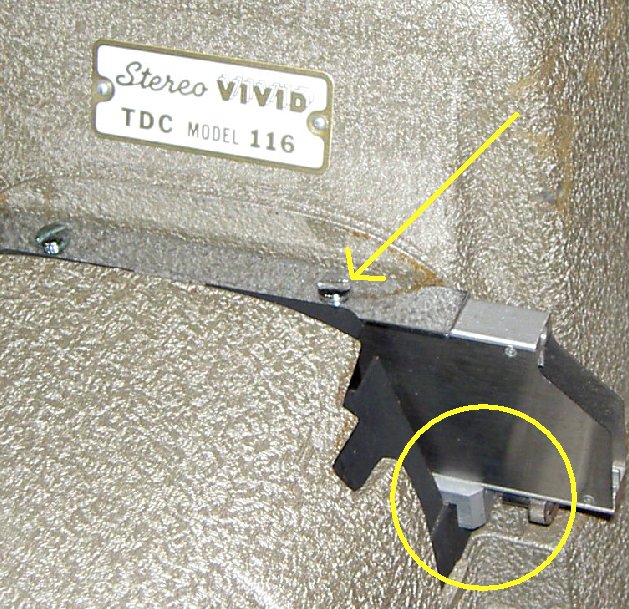
Late in production, TDC made a slide changer for their 716 and Project-or-View projectors that was also used in the 116 projectors. These changers were made of stainless steel and worked much more smoothly than the aluminum changers, but had to be modified to fit the larger carrier opening of the 116. In the photo below you can see the plate on the top, and the sectioned bottom plate that fits over the bottom black frame. There was no tab at the top for securing the changer. This was accomplished with two thumb screws on the bottom.
The aluminum 116 changer has two slots for slides. The forward slot (toward the lenses) is for standard Realist format slides (1 5/8" X 4") and the rear slot is for 2" X 4 1/2" stereo slides or for 2" X 2" slides. To remove the last slide after projecting, put another slide in the changer and only push it half way through. Both sides will have a corner sticking out that you can reach to remove them.
Stereo Selectron changers and unmodified 716 changers can also be used in the 116, but you must use the specially made frame (116S-38 adapter) to secure them in the 116.
Focus
To fine tune the focus, first select a sharply focused stereo slide with good details and load it into the projector. Screw both lenses all the way into their mounts then back them out one and one half turns. Turn the left projector lamp on and focus the slide on your screen using the regular focus knob (you can have the screen up close so that you can see the details from the projector). Once the left lens is sharply focused, turn the left lamp off and the right lamp on. Now focus the right lens by turning the lens in its mount. When the right lens is focused sharply both lenses will now be in focus. Now don't touch the lenses for focusing, only use the focusing knob.
To set your projector up for projection, put a slide in the projector and set the focus. Once focused, turn the image tilt and the interocular adjustments until the outside frame edges of the slide are on top of each other. The two images should look like one, completely overlapped. If your slide is mounted properly, this will give you the best stereo image. If you have to move either of the adjustments to make the picture "look right" then the slide is not mounted properly for projection.
I will be adding some illustrations to this page as time goes on.
Thanks, Tom
To place an order email to tlmartin@bitstream.net
[Home Page | 3D Stuff | 2D Cameras | Tru-Vue | View-Master]